Those fine folks at Chalk Couture have come up with a fantastic kit. First of all, what a great idea to have kits. They’re a no brainer purchase – and who doesn’t like that. I know I love it when I don’t have to bend my brain for ideas and color matching. Nope, not necessary with the kits.
The Chalkmade Be Merry kit includes the following:
- 1 Be Merry B-sized Transfer (8½” x 11”)
- 7 paperboard pennants with glossy coat for easy chalking
- 3 Candy Apple Chalkology Paste Singles
- 1 Black Velvet Chalkology Paste Single
- 1 Mini Squeegee
- 2 Color Trays
- 2 tassels
- 58″ black grosgrain ribbon
Now for the tips on this kit.
Wax your banner pieces
Get yourself some Surface Wax and use it. Why? There are typically two reasons to wax a surface: to help the paste adhere to a slick surface and/or to help the transfer peel up properly from the surface without sticking and tearing. In this particular case it is both, but definitely the latter most importantly. The smooth paperboard surface is also kinda overly grippy to Chalk Couture transfers. If you can’t easily peel up the transfer, it will get stretched and warped and may even tear. And that will make baby Jesus, and your wallet, cry.
Fuzz, Fuzz, Fuzz that transfer!
Get out that fuzzing cloth and use it. A lot. Repeatedly. This (and most all newly manufactured) transfers are waaaaaay more sticky than they were. And, I may be wrong, but the paper nature of this surface might make it more accepting of adhesive and so fuzzing, with the waxing, will ensure your paste staying down while releasing your transfer without damage.
Clean in Between.
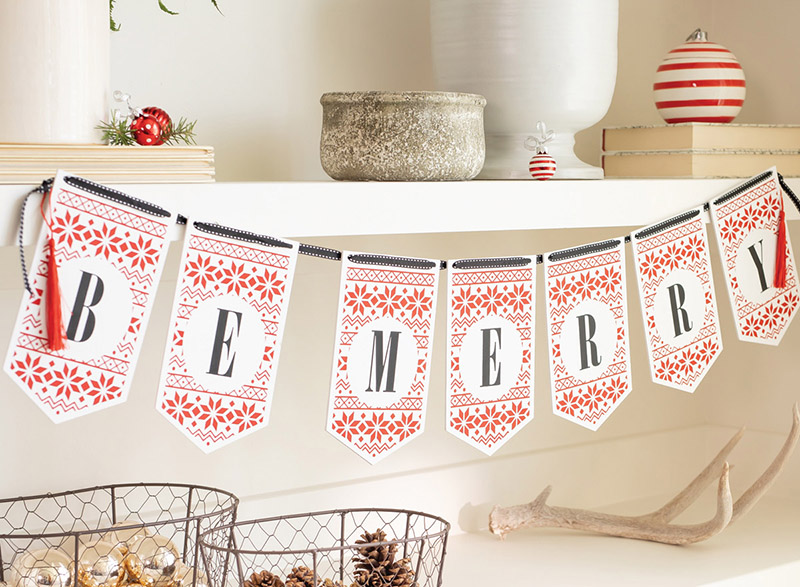
When completing this project, it’s a good idea to clean and dry your transfer between each piece. Why? I would wash it between each one to prevent a smear in case some paste got underneath the transfer onto the underside. If it does, when you go to your next piece it will smear. And since this surface is one time use, that will make a mess you won’t like. Distressed is one thing, but distressed mess is not what we’re looking for. Of course, it has to be completely dry before you move to the next piece because this surface is paperboard, which doesn’t play well with water. No one wants a curly, warped, pennant banner, right? If all goes well, and why wouldn’t it, since the kit comes with directions and links to video how-to’s, your finished project will look like this one…sooo pretty.
That’s it for this week’s Tip Tuesday. Stay Safe and Chalk On.
