Tip & Trick Tuesday. Every Tuesday, I will try and make you aware of a useful tip or trick you might not know about to help you make the best of your Chalk Couture products. It might be about an accessory, or chalk or surface… whatever gem of wisdom and experience my little heart desires to impart to you. This week: the Circle Mask and why you need it.
Nope. It’s not that goofy movie with Jim Carrey. It doesn’t have anything to do with my fave guilty pleasure, the Masked Singer. I really do love it. Who the heck is the Doberman, anyway.

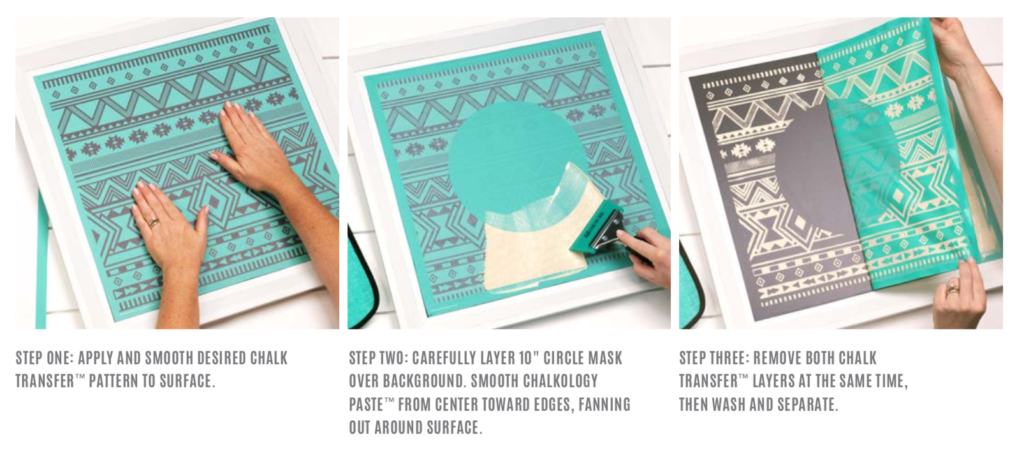
What is the Mask? The genius folks at Chalk Couture created a transfer that works as a mask. The 10 inch Circle transfer is a transfer made in reverse, so it blocks out an area of whatever you’re chalking, like a pattern. Why do you need that? Well, to oh so easily do a transfer inside a transfer.
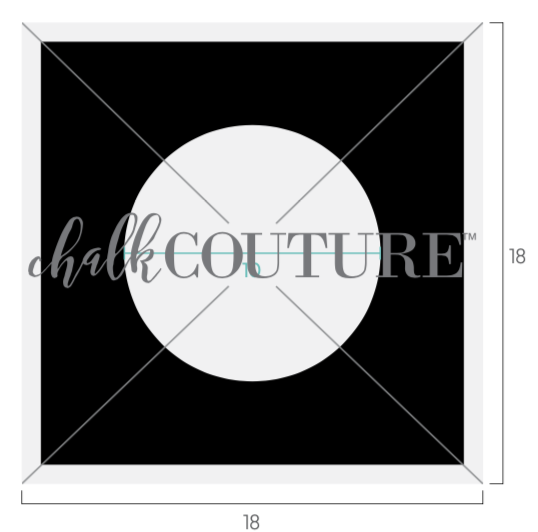
How do you use the Circle transfer? Here’s a quick show of direction. What you do is place your bottom layer, like a pattern for instance, then carefully add the circle over top. Then, when you chalk, pull the paste from the center, to the outside. When you’ve covered your surface you wish to chalk, remove both transfers at the same time, clean and separate the transfers. This is the recommended method, but I have done it slightly differently with success, so you can probably create in whatever way makes you comfortable.
You could, then, use a smaller transfer and chalk it inside the circle. Fantastic, huh?
Here, I created a project with the French Country Transfer as a background with the Circle transfer over and the Ooh La La transfer inside the masked area.
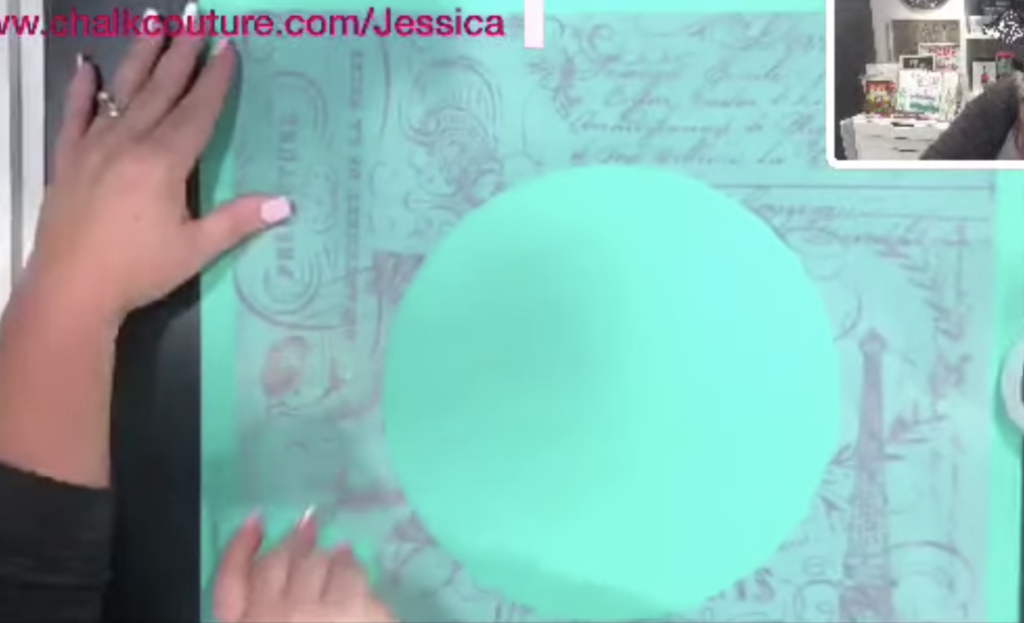
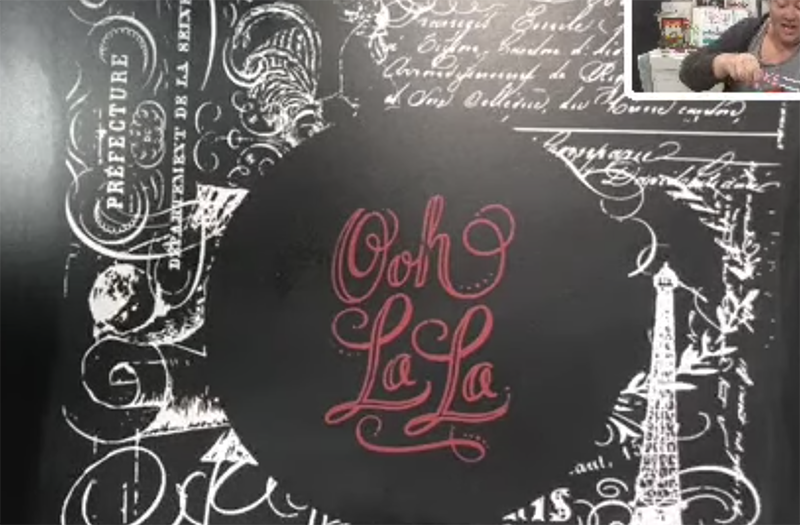
Place your circle over your pattern. Then, you can start chalking, being careful around the edges of the circle, so it doesn’t get pulled up.
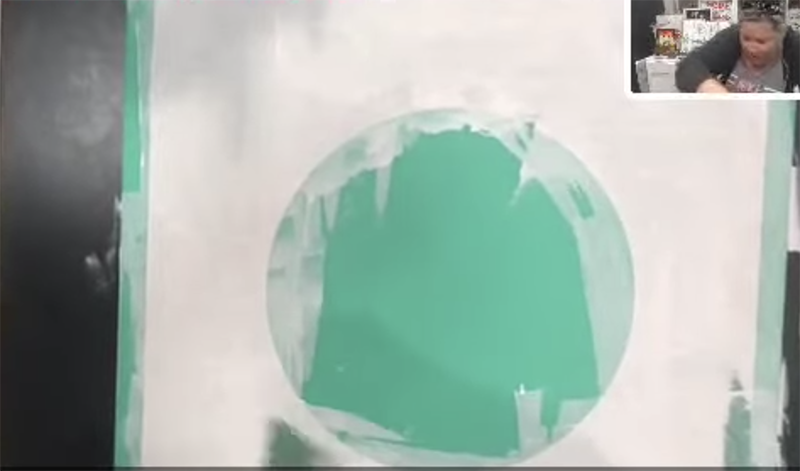
Now, carefully pull off the transfers to reveal your masked pattern.
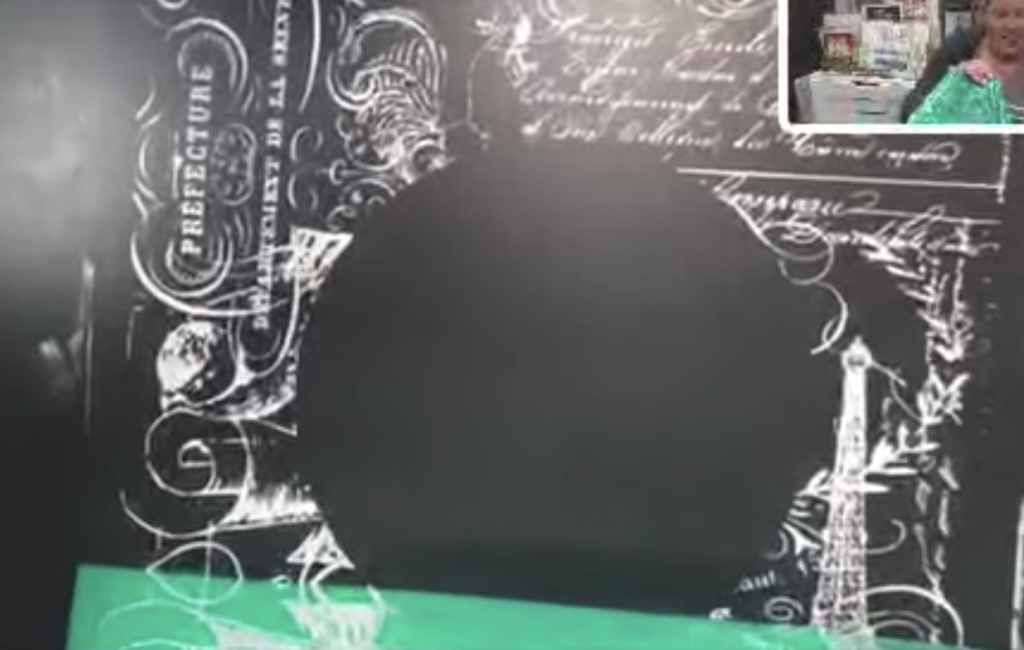
Once your paste has dried, (or speed it along with a dryer) you can add your inner design.
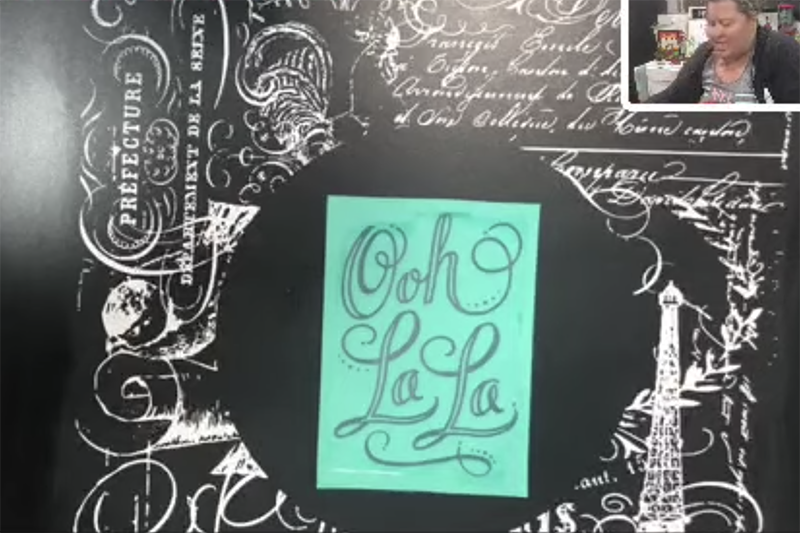
And, Voilà! Your beautiful masked layered creation is done!
Other ways to use the circle transfer? Instead of another transfer, you could add a ribbon, ornament or other embellishment in the open space. It’s really up to you and your creativity.
Check out the video below to see how I created this project.
Hope you enjoyed this week’s tip.
Happy Chalking!
